Connecting to Your Instance
After setting up your server, you receive access using the IP address stated in the console. You can also easily copy the SSH login from the instance card or overview page.
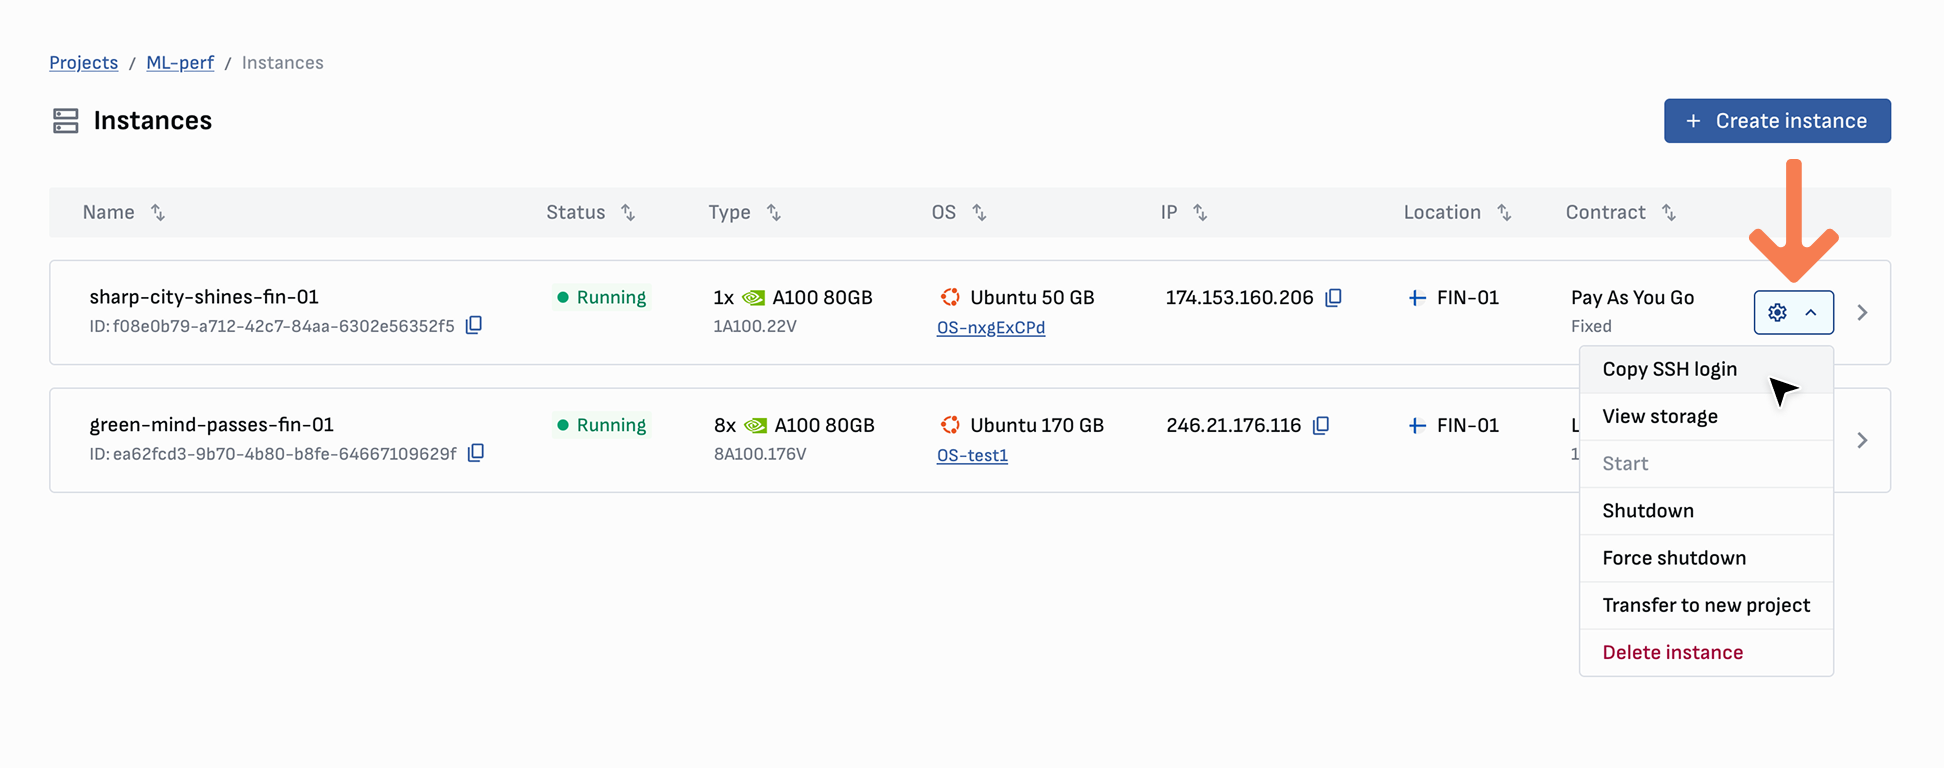
If you are using a command line tool/terminal, you can connect to your instance using the following command:
ssh -i /path/to/your/key/id_rsa [email protected]
Alternatively, you can use your favorite SSH client to connect to the server. Below is an example using Putty:
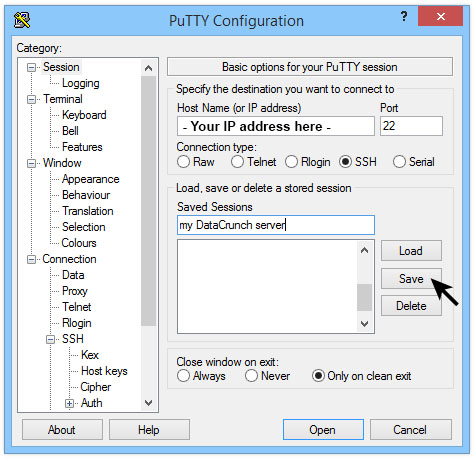
Add your server info to Putty and click Save. After saving, you will need to add your private key:
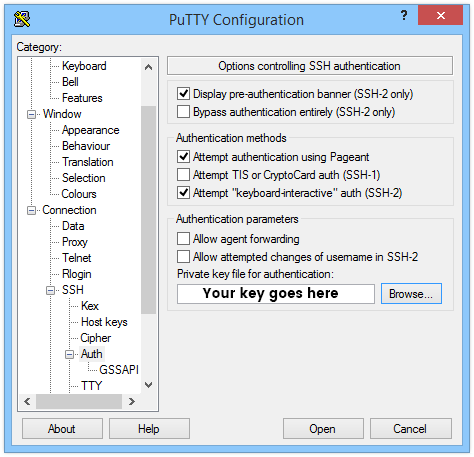
Add your key, go back to session and save again. Don’t forget to click save again on session, or your private key won’t be saved!
Next, we click Open and are greeted with our login screen. Use username root to proceed. If you used an authentication key with a passphrase, you will be prompted to type it in. You should now be logged in now!
Tip
You can paste text into your terminal in Putty by right-clicking. You can copy things from your terminal to your Windows desktop by just selecting text (no need to press ctrl+c or copy), it will save the text in the clipboard.
Sometimes it is useful to manage the CPU and GPU instances from a visual desktop interface.
Follow these steps to set up a remote desktop environment with VNC server using TigerVNC on Linux systems like Ubuntu 24.04. This setup allows you to remotely access a lightweight graphical desktop on Verda virtual machine instances.
Connect to your instance using SSH
Update The System
Follow the instructions on Securing Your Instance if you have not done that before
Install XFCE Desktop Environment and tigerVNC server
Remove nvidia drivers and reboot if using CPU only node
Start the VNC server:
Now your instance has a VNC server running and is ready for the VNC connection. Next commands are run on the machine that you want to use for viewing and controlling the desktop.
Create an SSH tunnel to secure the VNC connetion
Run this command on the machine that you will use to connect to your instance. If you want to keep the SSH tunnel connection in the background, you can use screen or tmux commands.
Connect Using a VNC Client
Use any VNC viewer (e.g., TigerVNC Viewer, RealVNC, or Remmina) and connect to localhost:5901.
Tips
- You can change the vnc ports and make multiple connections, they will get assigned different ports 5901, 5902 etc..
- You can also use other compatible Linux desktop environments like Ubuntu Desktop (Gnome), KDE Plasma on the instances. XFCE Desktop is recommended for most users since it is lightweight and simple to use without much configuration and works with default Verda OS images.