# Connecting to Your Server
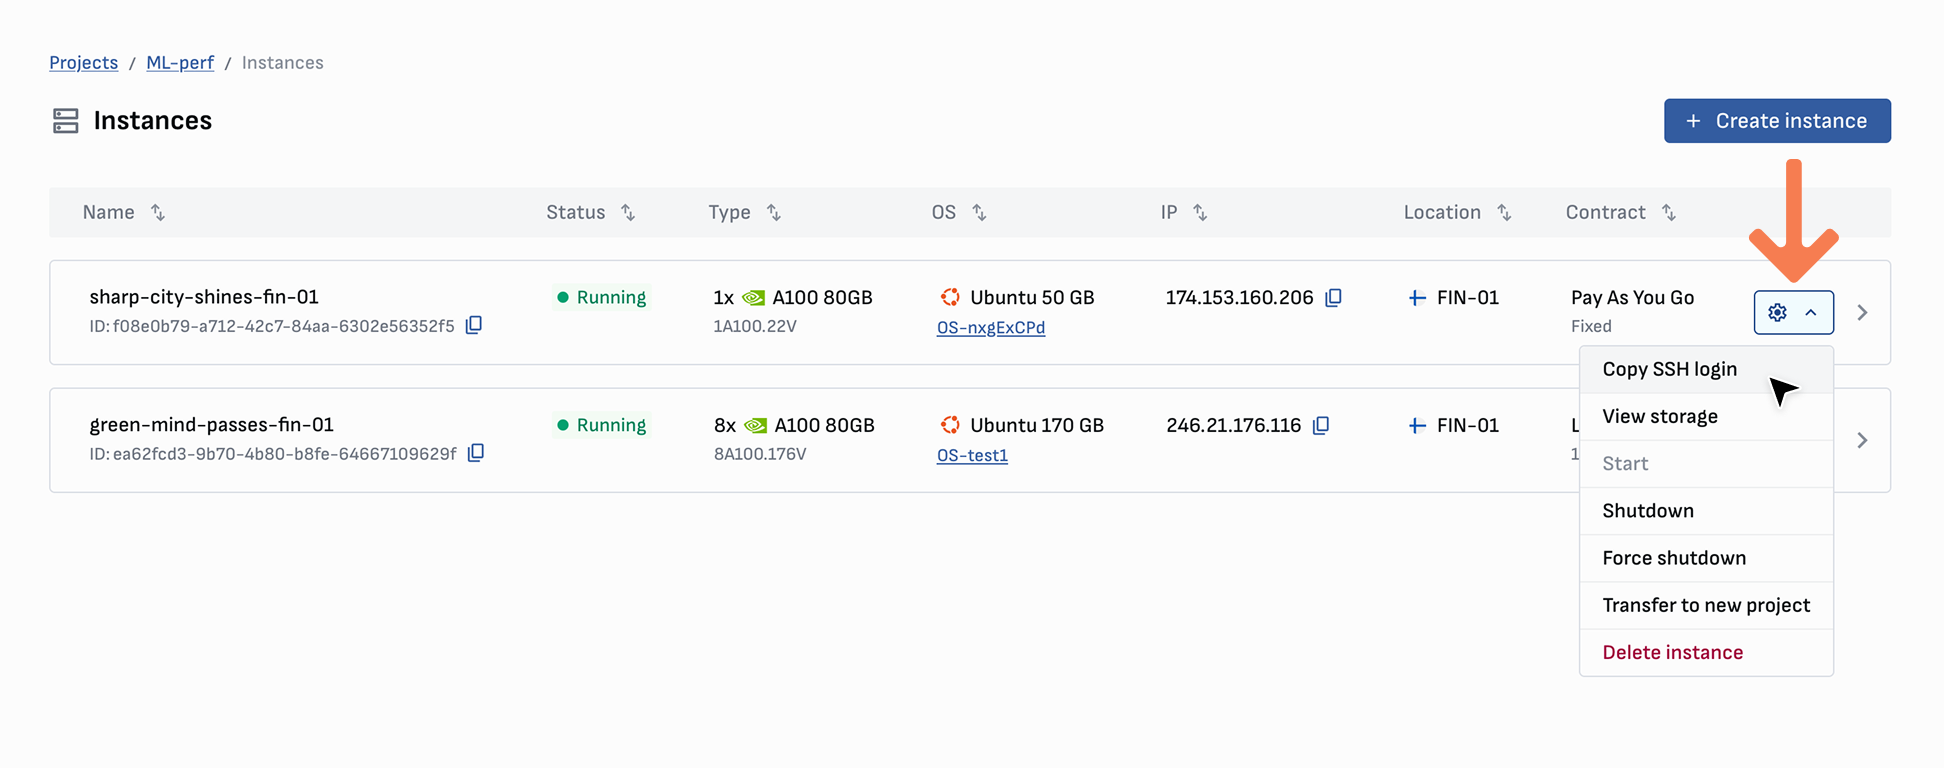
After setting up your server, you receive access using the IP address stated in the console. You can also easily copy the SSH login from the instance card or overview page.
If you are using a command line tool/terminal, you can connect to your instance using the following command:
```bash
ssh -i /path/to/your/key/id_rsa root@135.181.63.202
```
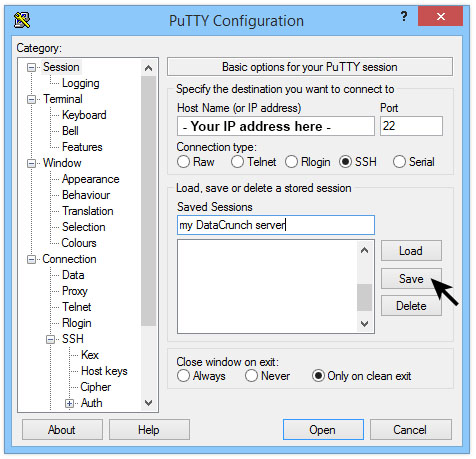
Alternatively, you can use your favorite SSH client to connect to the server. Below is an example using Putty:
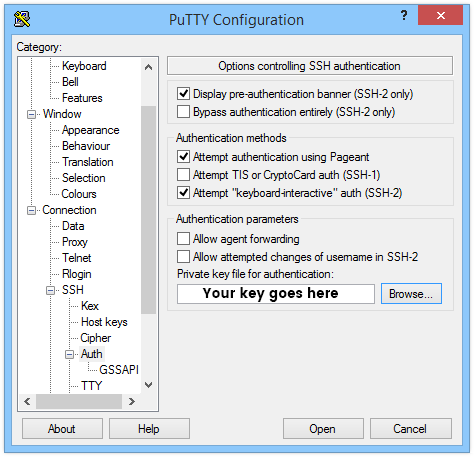
Add your server info to Putty and click `Save`. After saving, you will need to add your private key:
Add your key, go back to `session` and save again. Don’t forget to click save again on `session`, or your private key won’t be saved!
Next, we click `Open` and are greeted with our login screen. Use username `root` to proceed. If you used an authentication key with a passphrase, you will be prompted to type it in. You should now be logged in now!
{% hint style="info" %}
Tip: You can paste text into your terminal in Putty by right-clicking. You can copy things from your terminal to your Windows desktop by just selecting text (no need to press `ctrl+c` or copy), it will save the text in the clipboard.
{% endhint %}