# Managing SSH Keys
## Creating an SSH Key
### Linux
Run the following in your terminal:
```bash
ssh-keygen -t ed25519
```
By default, the key will be stored in `$HOME/.ssh/id_ed25519`, you can change the location if needed. You will be prompted for a passphrase next.
{% hint style="info" %}
In general, it is a good idea to set a passphrase for your private key.
{% endhint %}
If you used the default key name it is now saved in `$HOME/.ssh/id_ed25519.pub`
To view your public key, type:
```bash
cat .ssh/id_ed25519.pub
```
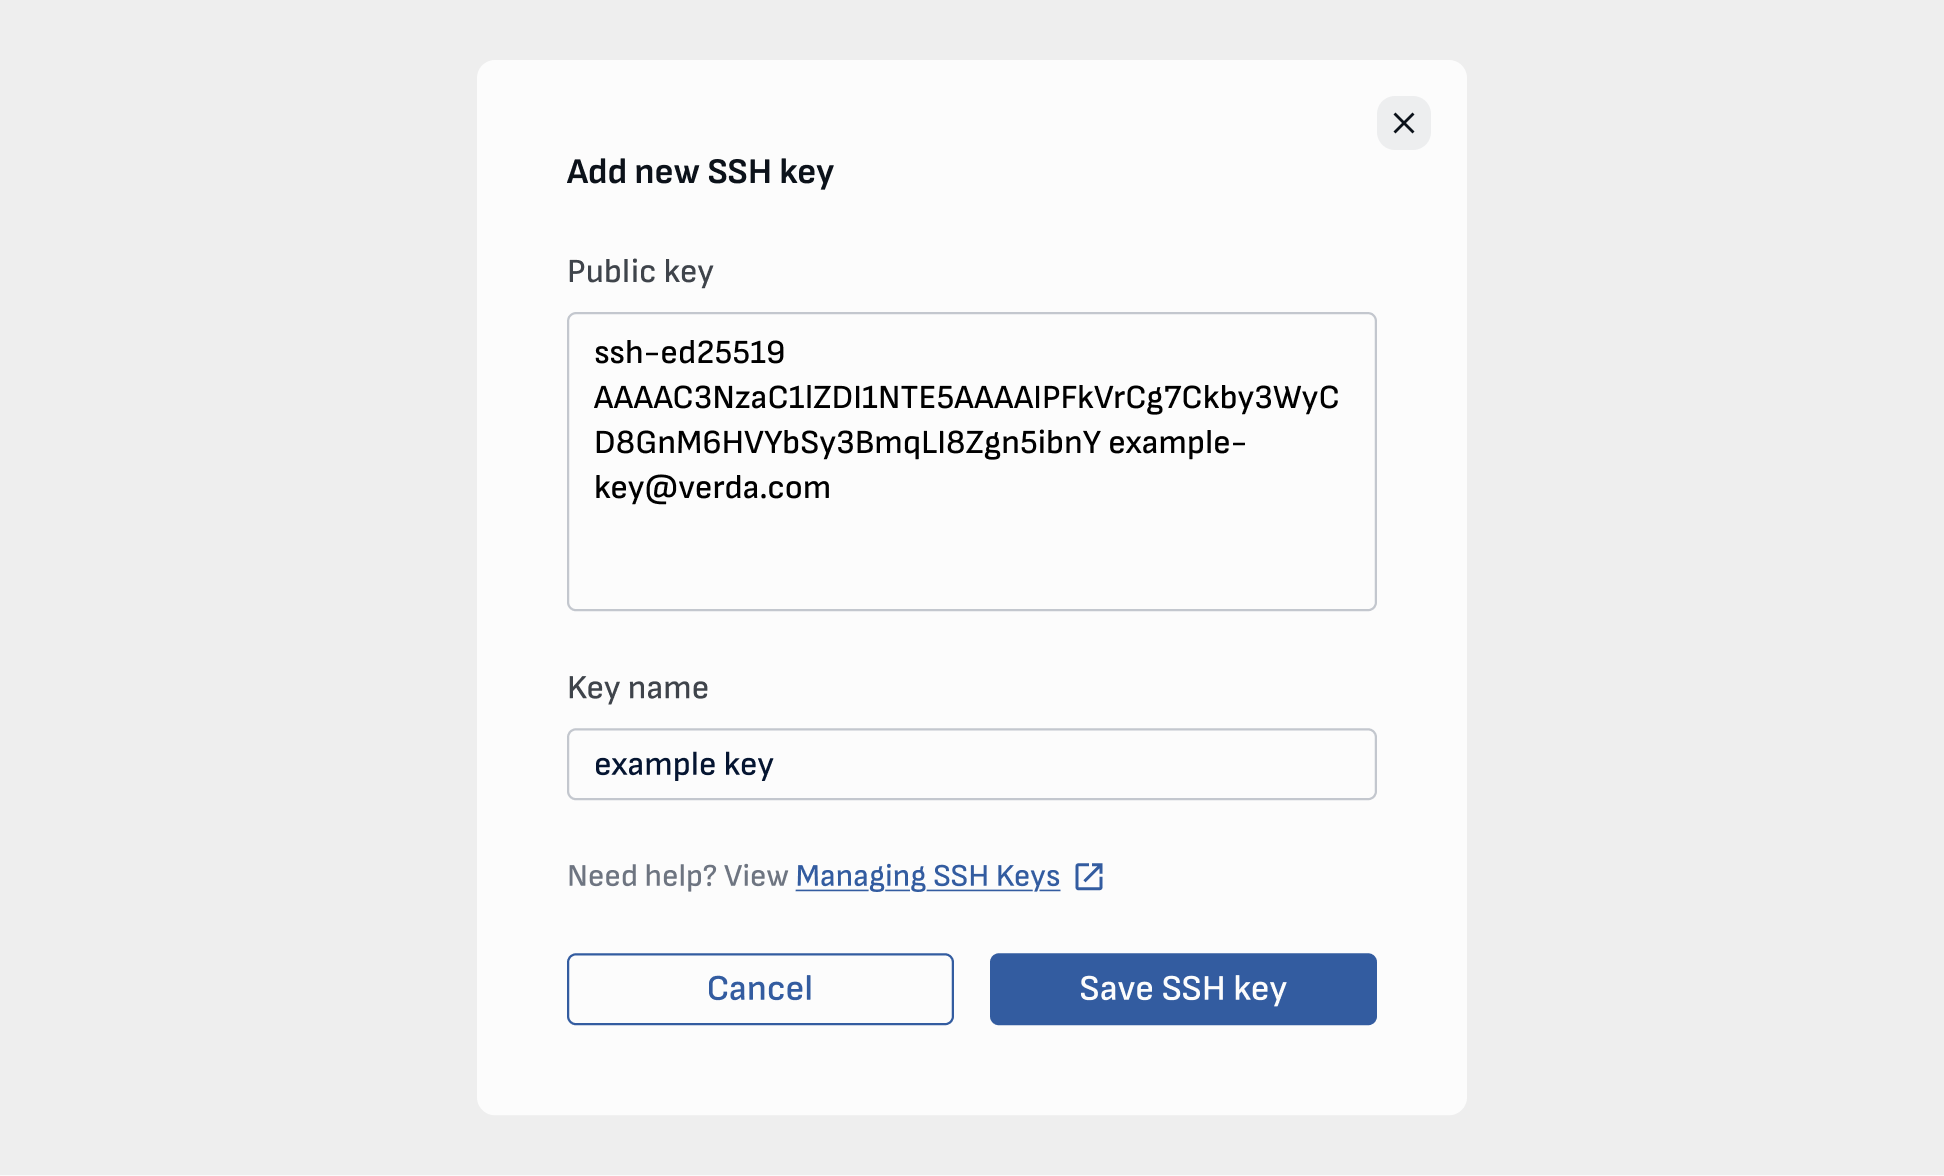
You can now add your public key to your project to be available when creating new instances.
Go to `Keys -> SSH Keys -> Create` and paste your key into the window that looks like this:
Next, you can add your key, deploy your server and your key will automatically be allowed on your instance!
### Windows
When setting up compute, you need to provide an SSH key to provide secure access to your server.
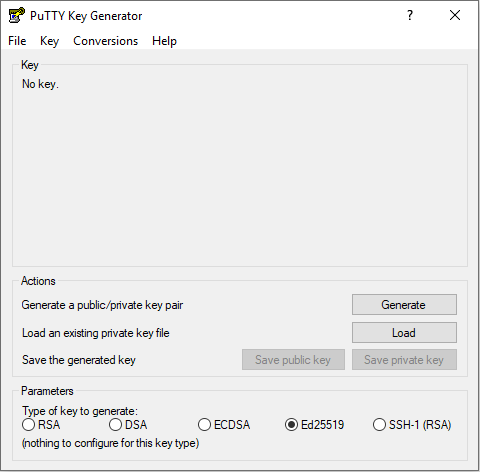
Here, you will learn how to create such a key using PuttyGen.
When installing Putty, you can choose to install PuttyGen as well, so let's fire it up:
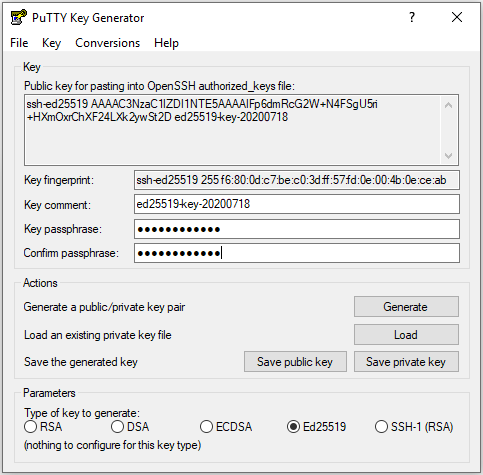
We choose `Ed25519` as the type of key, and click 'Generate'. Move your cursor over the grey area, and your key will appear.
{% hint style="info" %}
Don't forget to add a passphrase to your keys!
{% endhint %}
Copy the output in the `Public key` field on top and **save your private key somewhere safe.** You can use PuttyGen to re-generate your public key from your private key but not vice versa; hence, we only need to save the private key.
When creating your server, you can paste the output in the Key input field.
Next, you can add your key, deploy your server and your key will automatically be allowed on your instance!
***
## Add/remove SSH key to existing instance
Log into the instance.
Edit the file `/root/.ssh/authorized_keys` and add the new key in a new line, or remove an existing key.